Assembling Monarco HAT and Raspberry Pi (B+, 2, 3, 3B+)
Step 1 - Raspberry Pi
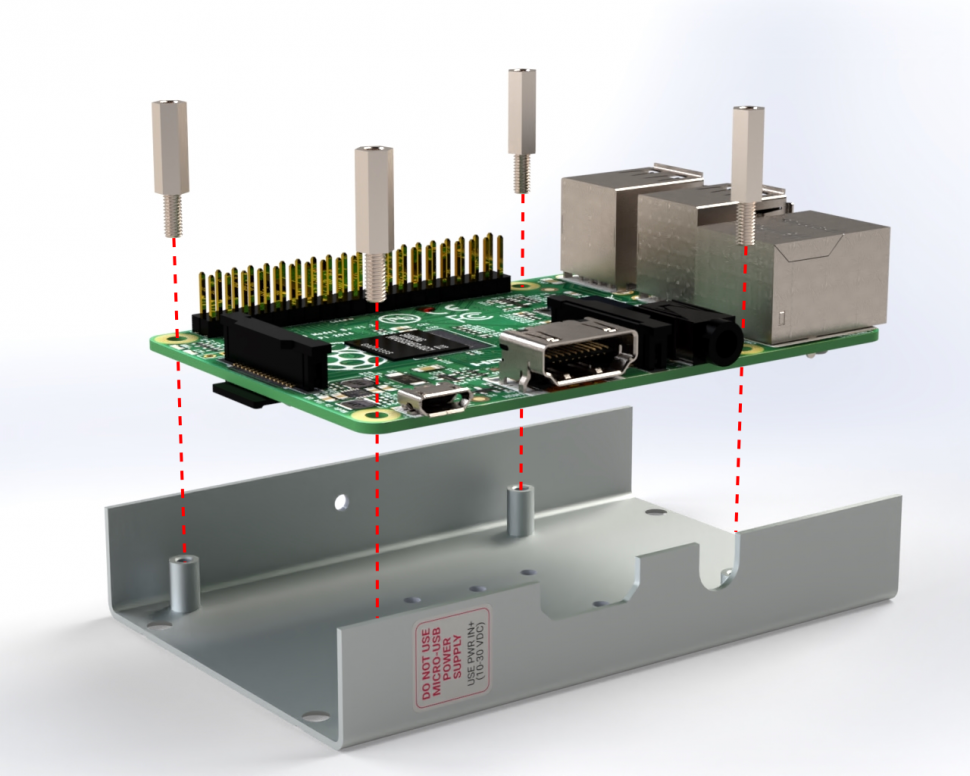
Use metal spacers to attach the Raspberry Pi to the bottom part of the aluminium case.
Step 2 - Monarco HAT
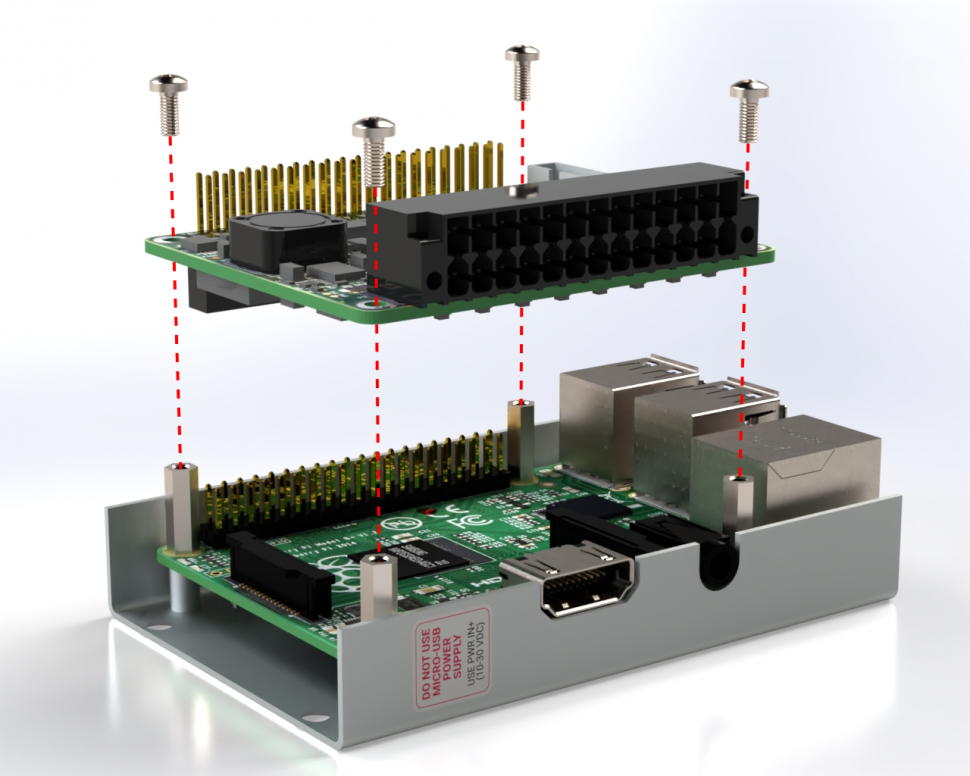
Attach the Monarco HAT on top of the Raspberry Pi and use screws to fasten it.
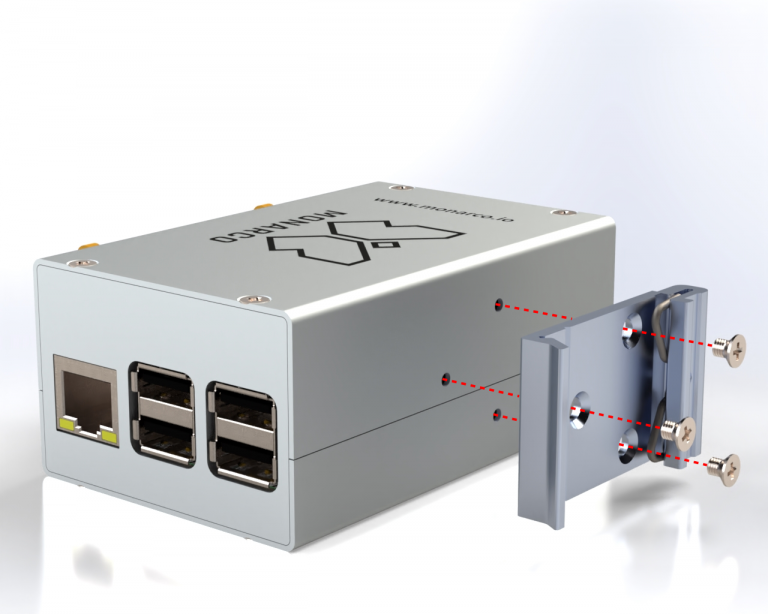
Step 3 - Side panels
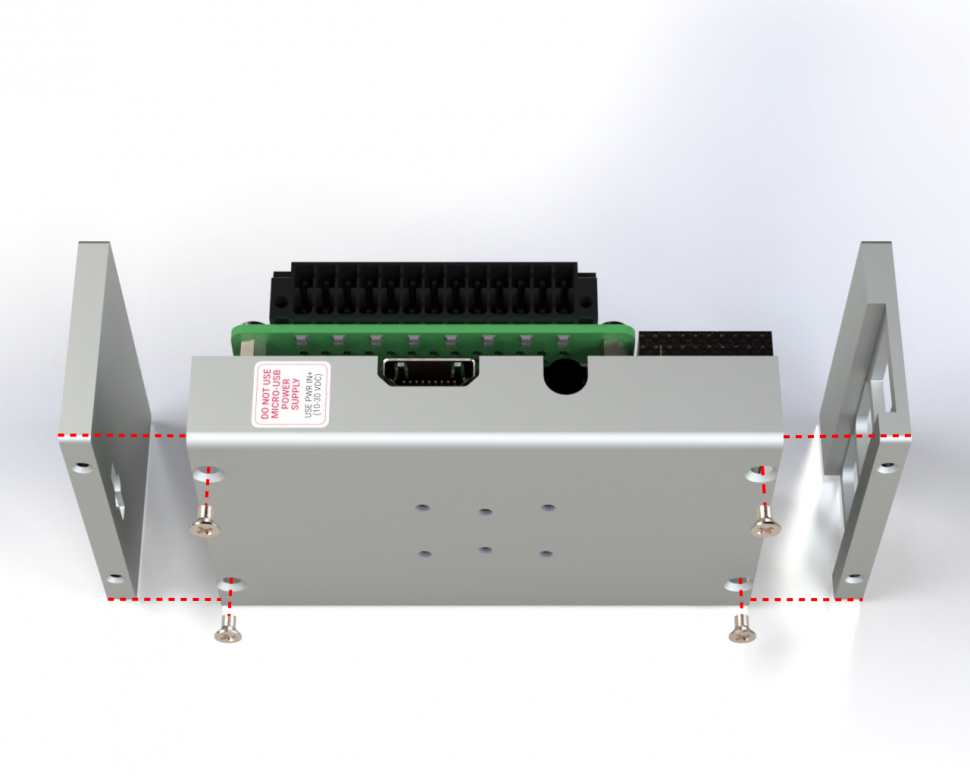
Mount the side panels and tighten the screws.
Step 4 - Closing the case
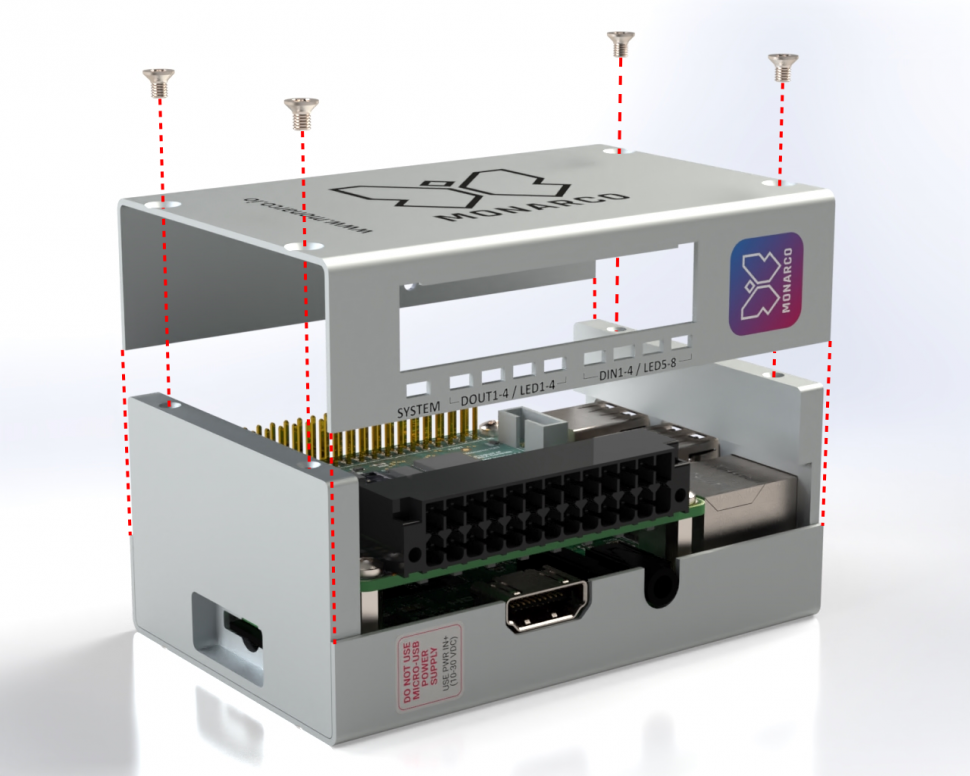
Mount the cover and tighten the screws.
Step 5 - Connector and micro SD card
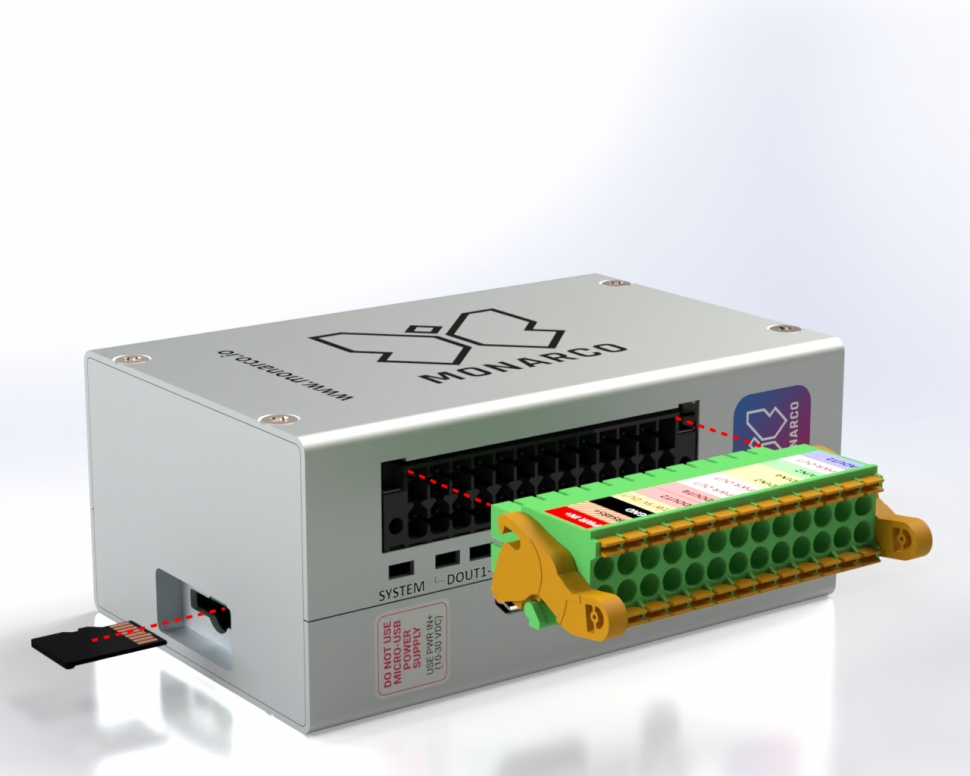
Plug in the connector and micro SD card. Make sure that the locking levers are in the middle position.
Step 6 - Mounting feet
Insert mounting feet according to your preferences. This is for vertical mounting...
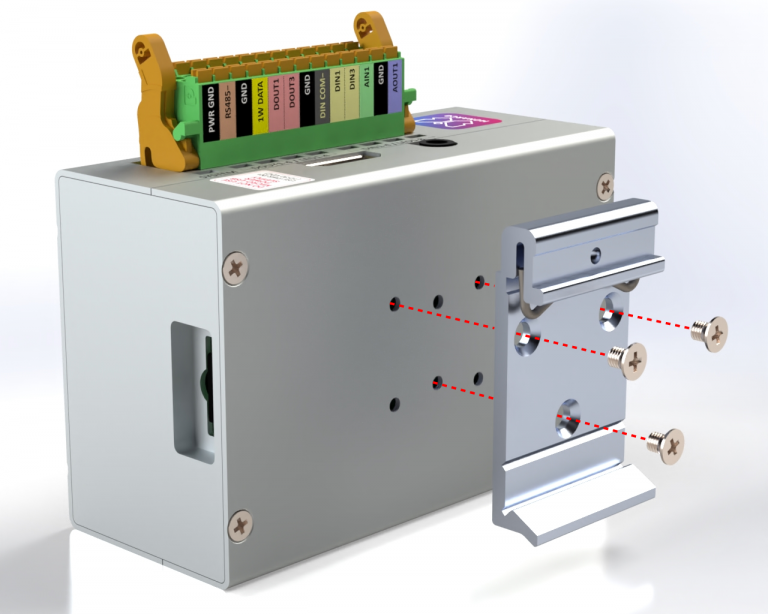
... and this is for horizontal mounting.
Step 7 - DIN rail mounting

The aluminium case allows vertical mounting...
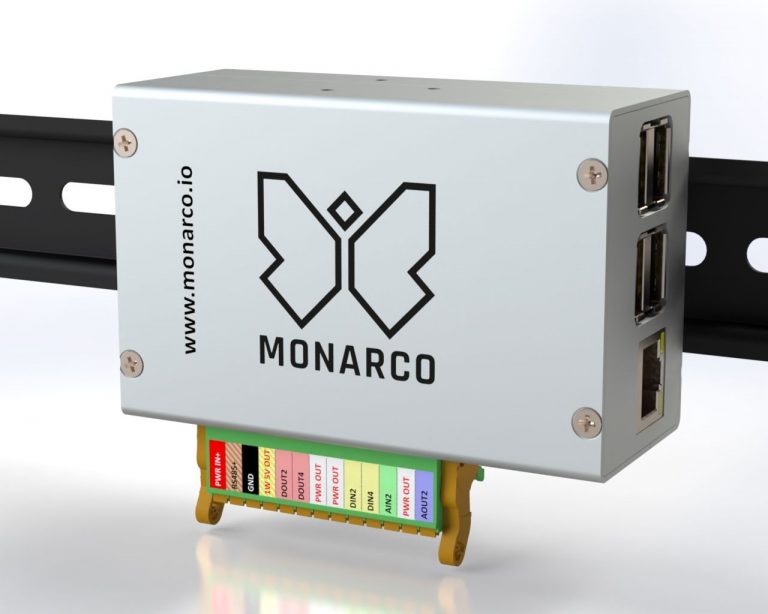
... as well as horizontal mounting.